Test Editor - Actions & Steps
This guide covers all available action types and flow control structures in the Shiplight AI Test Editor.
Table of Contents
- Available Action Types
- Pick Locator
- Flow Control Structures
- AI Toggle Switch
- Vision Mode Switch
- Converting Between Action Types
- Best Practices
- Next Steps
Available Action Types
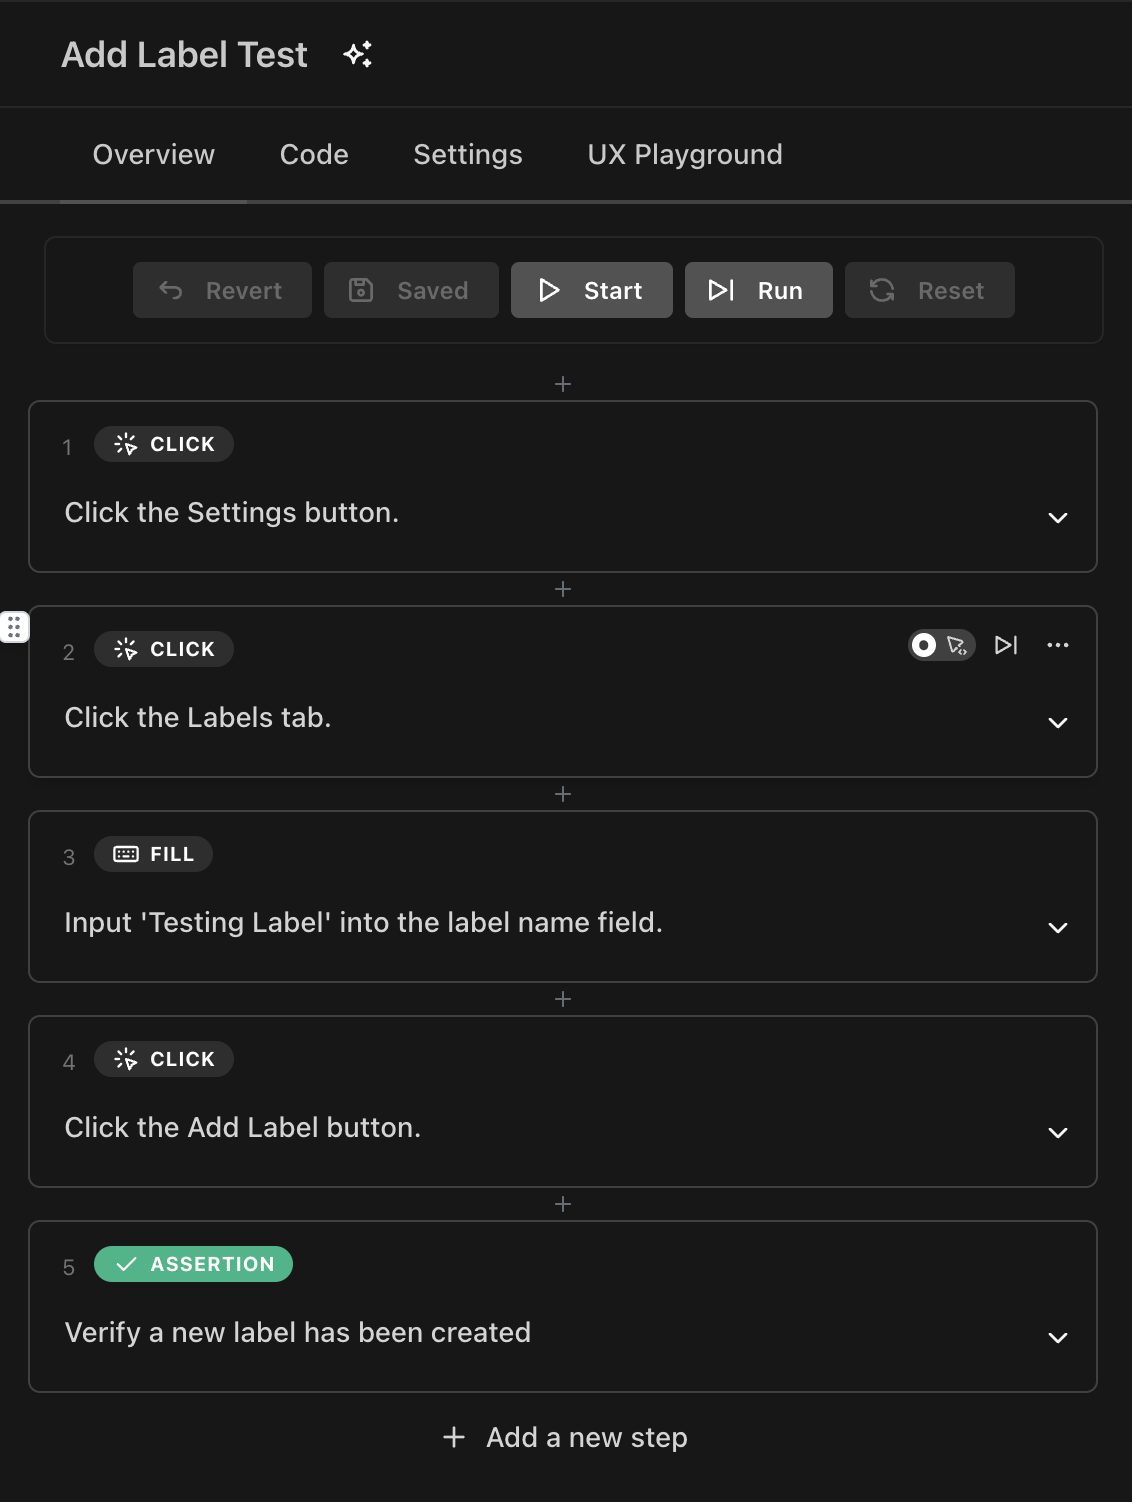
Access action types through the dropdown menu (⋯) on any step:
1. Action
General interactions with web elements. The AI automatically detects the specific action type based on your description.
AI Mode (Dynamic Mode):
- Toggle the AI switch to enable natural language input
- Write descriptions like "Click the submit button" or "Type email@example.com in the email field"
- AI automatically converts to appropriate Playwright commands
Fast Mode (Non-AI): The system detects specific actions from keywords in your description:
- Starting with "click" → Click action
- Starting with "type", "enter", "input", "fill", "write" → Fill action
- Starting with "navigate", "go to", "visit", "open", "browse" → Navigate action
- Starting with "select" → Select action
- Starting with "scroll", "move" → Scroll action
- Starting with "hover" → Hover action
- Starting with "wait", "delay", "pause", "sleep" → Wait action
- Starting with "upload" → Upload action
- Starting with "drag", "drop" → Drag and drop action
- Starting with "go back", "back" → Navigate back
2. Assertion
Verify expected outcomes and states on the page.
AI Mode:
- Natural language descriptions like "Verify the success message appears"
- Automatically converted to appropriate verification statements
Examples:
Assert page contains "Payment successful"
Verify submit button is enabled
Check that error message is not displayed
3. Code
Write custom JavaScript with full access to Playwright APIs, HTTP requests, and the test variable store.
For the full reference — available context, common use cases, and limitations — see Code Step.
4. Function
Use pre-defined reusable functions from your function library.
Features:
- Select from saved functions
- Pass parameters to functions
- Functions can be shared across tests
5. Upload File
Upload one or more files from Test Data during test execution.
You can upload files in two ways.
Option 1: Upload File Action Type
- Select "Upload File" from the action type dropdown
- The Select Test Data Files modal opens
- (Optional) Fill in Upload Target Description to identify the correct upload field when there are multiple upload areas on the page(e.g.,
profile picture upload) - Search and select one or more files from the list
- Click Select File to confirm
Option 2: Natural Language(AI Mode)
In AI mode, describe the upload step directly using the file name:
Upload invoice.pdf
Attach data.csv to the form
The file name must match a file uploaded in Test Data.
Notes:
- Files must be uploaded in Settings > Test Data before they can be selected in the Upload File action
- Multiple file uploads are supported
6. Extract
Extract information from the page and store it in a variable for later use in your test. This action is commonly used to capture dynamic values that exist during the test execution. For details on variable types, scope, persistence, and advanced usage, see Variables.
How to Use:
- Select "Extract" from the action type dropdown
- A configuration modal appears with two fields:
- Element Description: Describe what content to extract in natural language
- Examples: "order confirmation number", "total price", "user email"
- Variable Name: Name for the variable to store the extracted value
- Examples: "orderNumber", "totalPrice", "userEmail"
- Element Description: Describe what content to extract in natural language
- Click Save to configure the extraction
Examples:
Extract order confirmation number and save to orderNumber
Extract total price and save to totalPrice
Extract user email from profile and save to currentEmail
Using Extracted Variables:
After extraction, the value is stored as a variable and can be referenced in later steps using the variable name.
Examples:
Verify the order number is $orderNumber
Type {{currentEmail}} in the email field
Common Use Cases:
- Store dynamic IDs or reference numbers for later verification
- Extract data from one page to use in another
- Capture generated values (order numbers, confirmation codes, etc.)
- Pass data between different parts of your test flow
Note: This action uses AI to intelligently locate and extract the specified content from the page, making it resilient to UI changes.
7. Wait Until
Wait for a specific UI condition to be met before continuing test execution.
- Condition: Describe the UI condition to wait for in natural language
- Max Timeout: Maximum time to wait in seconds
Example:
- WAIT UNTIL 'the submit button is enabled' with max timeout 15 (seconds)
8. Group
Create a nested group of actions that can be collapsed/expanded.
Features:
- Organize related actions together
- Add descriptive group names
- Can contain any other action types
- Supports AI generation of group contents
AI Mode: When AI is enabled, you can describe the group in natural language and the AI will generate the necessary actions:
Group: Complete the checkout process
[AI generates the detailed actions]
9. Template
Note: Templates were previously called "Reusable Groups" in the UI.
Templates allow you to define common test sequences once and reuse them throughout your test suite, improving maintainability and reducing duplication.
Learn More:
For detailed information about creating and managing Templates, see Templates.
10. Extract Email Content
Extract content from emails for verification or use in subsequent test steps. This action requires prior setup in test account settings.
Prerequisites:
Before using this action, you must:
- Enable email extraction in your test account settings
- Configure the extraction method (Verification Code, Activation Link, or Custom)
- Set up email forwarding to your generated Shiplight forwarding address
- Configure email filters (From, Subject, Body Contains)
Extraction Types:
- Verification Code: Extract numeric/alphanumeric codes (e.g., "123456", "ABC123")
- Activation Link: Extract clickable links for account activation, password reset, etc.
- Custom: Use AI-powered extraction with natural language instructions
Common Use Cases:
- Extract verification codes for two-factor authentication
- Get password reset links from emails
- Extract account confirmation or activation links
Learn More:
For detailed setup instructions, email forwarding configuration by provider, and advanced options, see Email Content Extraction.
Pick Locator
Pick Locator is an interactive tool that helps you select precise element locators directly from the browser during test debugging.
How to Use Pick Locator
Pick Locator allows you to interactively select elements from the live browser and automatically generate Playwright locators for your test steps.
Prerequisites:
- The step must be an Action statement (not Assertion, Code, etc.)
- A debug session must be active with Live View open
Two Ways to Access Pick Locator:
Option 1: Using the Pick Button (Live View Toolbar)
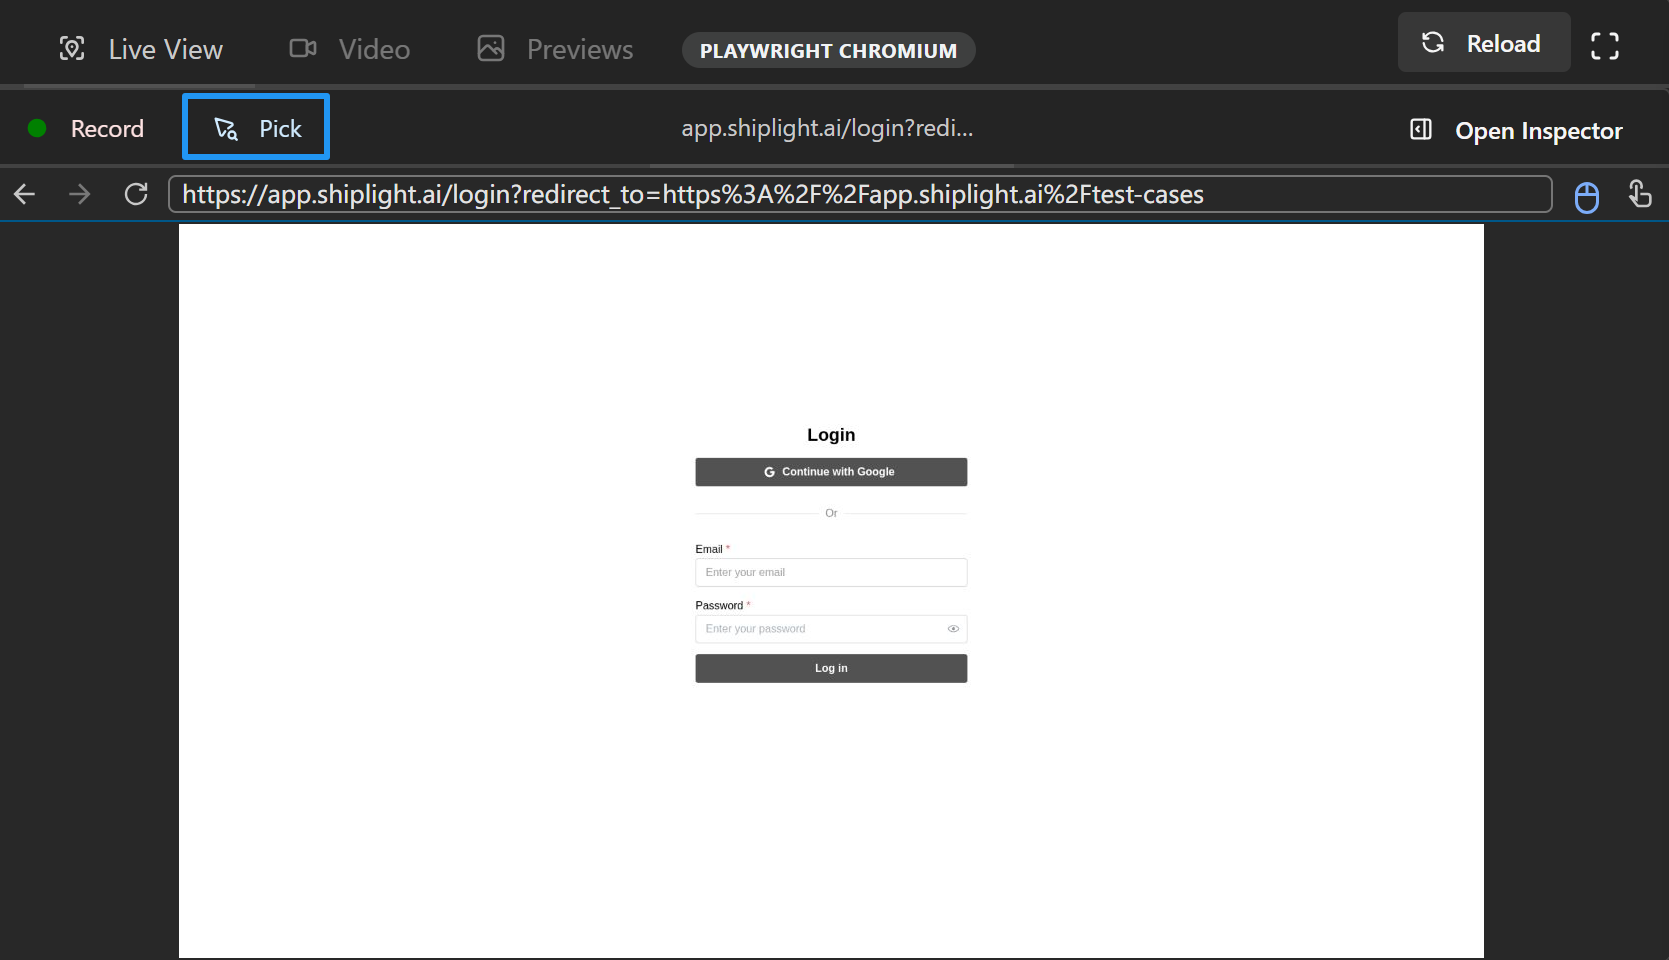
- Click the 'Pick' button in the toolbar next to the Live View title bar
- Move your mouse over the Live View browser to the element you want to select
Option 2: Using Context Menu
- Click the ... menu for the step you want to add a locator to
- Select "Pick Locator" from the context menu
- This option only appears for the current step during debugging
- Only available for action statements
Then (for both options):
- Click the target element to select it
- The click event is NOT passed to the browser
- Only the element locator is captured
- The locator is applied to the current executing test step in the left panel
- The test step maintains its action type (click, input, etc.)
- Only the element locator is updated with the one you picked
What Happens:
- The generated locator is attached to the action step
- The locator will be used during test execution
- This provides more precise element targeting than AI-based selection
- The action type remains unchanged (only the locator is updated)
Flow Control Structures
If/Else Statement
Execute different actions based on conditions.
Structure:
- If - Condition to evaluate
- Then - Actions to execute if condition is true
- Else - Actions to execute if condition is false (optional)
Condition Input:
- Natural language in AI mode: "User is logged in"
- JavaScript expressions in manual mode
Loop Statement
Repeat actions while a condition remains true.
Structure:
- While - Condition to check before each iteration
- Do - Actions to repeat
Examples:
- "While there are more items in the list"
- "While next button is enabled"
AI Toggle Switch
Each action has an AI toggle switch that enables two modes:
AI Mode / Dynamic Mode (AI On)
- Icon: Magic wand (✨)
- Behavior: Natural language descriptions are processed by AI in real-time
- Best For: Non-technical users, rapid test creation, dynamic web apps, flexible execution
Fast Mode (AI Off)
- Icon: Standard action icon
- Behavior: Uses cached actions with fixed selectors
- Best For: Performance, stable UIs, debugging, speed-critical tests
For details on how AI interprets steps and interacts with the UI, see AI Features.
Vision Mode Switch
Each action has a Vision Mode toggle that enables pure vision-based element detection. This is particularly useful when traditional DOM-based methods face challenges.
What is Vision Mode
Vision Mode uses visual recognition to locate elements on the page instead of relying on DOM information. When enabled, the AI agent identifies elements by their visual appearance rather than HTML structure.
How to Enable:

- Look for the Vision Mode toggle on each action step
- Toggle it ON to activate pure vision mode
- The action will now use visual recognition to find and interact with elements
When to Use Vision Mode
Vision Mode is particularly useful in the following scenarios:
1. Complex Element Descriptions
- When an element is difficult to describe precisely in natural language
- Elements with ambiguous or similar descriptions
- Elements that lack clear text labels or identifiers
2. Cross-Domain iFrames
- iFrames from different domains that block DOM access
- Third-party embedded content (payment forms, social widgets, etc.)
- Sandboxed iFrames with restricted access
3. DOM Access Limitations
- Shadow DOM components that are difficult to target
- Dynamically rendered content with unstable selectors
- Canvas-based or image-based UI elements
4. Visual-Only Elements
- Elements identified by position, color, or visual style
- Icons, images, or graphical buttons without text
- Custom-drawn UI components
Converting Between Action Types
To change an action type:
- Hover over the action
- Click the menu button (⋯)
- Select the new action type from the dropdown
- The action will be converted while preserving the description where possible
Keyboard Shortcuts:
Ctrl + Alt + A- Convert to ActionCtrl + Alt + T- Convert to AssertionCtrl + Alt + C- Convert to CodeCtrl + Alt + F- Convert to FunctionCtrl + Alt + U- Convert to Upload FileCtrl + Alt + E- Convert to ExtractCtrl + Alt + W- Convert to Wait UntilCtrl + Alt + G- Convert to GroupCtrl + Alt + R- Convert to Template
Best Practices
Using AI Mode (Dynamic Mode)
- Write clear, specific descriptions
- Avoid including element identifiers (IDs, classes, selectors) - let AI find the best element
- Use either business language or technical terms - AI understands both
- Let AI handle the implementation details and element selection
Using Fast Mode
- Start descriptions with action keywords (click, type, etc.)
- Be specific about target elements
- Use when you need precise control over specific selectors
- Helpful for debugging specific selector issues
Organizing Tests
- Use Groups to group related actions
- Keep each step focused on a single task
- Use descriptive names for groups
- Leverage loops for repetitive tasks